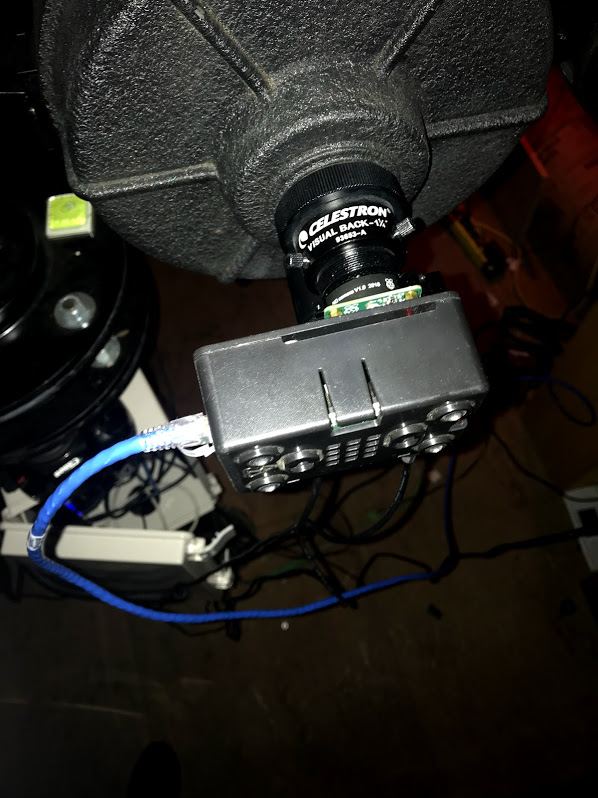
The camera is on the telescope ready to test! I’ve mounted the RpiHQ camera on a Raspberry Pi case with a Pi4 4GB and written a web based interface to the camera so I can try it out easily. The camera will be placed at the prime focus of my Celestron 8″ telescope (also driven by a RPi4 and Stellarmate) for testing.

The interface to the telescope is an aluminum Astromania C thread to 1 1/4″ nosepiece which slides into the telescope’s visual back. The RPi4 in the camera is connected to the observatory network so control will be via the web interface over the network.

The parameters available on the camera are extensive so the PHP form will make life a lot easier. You can see the actual raspistill command line in the return screen that shows the (currently black as the lens cap is on!) image returned from the camera.

UPDATE: First night out was a bust, I was able to image Jupiter quite well but was unable to get a long exposure (up to 200s) to show anything at all. I understand that there is now a RPi HQCam aware INDI driver for the Raspberry Pi, so I will set up the camera on the host Rpi4 as an INDI camera and try again next clear night. I also have a 16mm telephoto lens for the RPI HQ Cam so I will mount the camera on my telescope on a Celestron camera mount so I can run the camera as a remote imager and my Canon DSLR as main imager so I can work on software that will slew and solve like I want to implement for my new 16″ Dobsonian.